
This is a quick but thorough how to on how to use the manual carbonation tester. The manual, bench-top carbonation tester is inexpensive, easy to use, and more precise in piercing the container than any other manual device. It can fit any sized container between a can and a 3 liter bottle.
How to Use the Manual Carbonation Tester
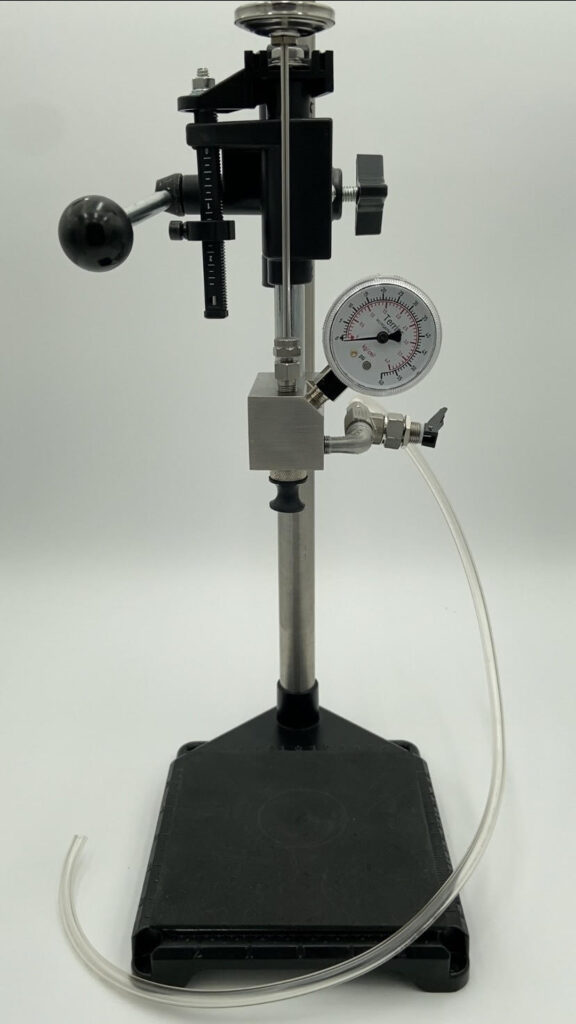
Piercing is a one hand operation and requires little force. A toggle valve takes the guesswork out of knowing whether the valve is open or closed. A special diaphragm assembly protects the gauge and lengthens its life. The diaphragm assembly is responsive to 1” of water pressure. The unit can be used with an ultrasonic shaker, which fits directly on the tester base.
To use the tester, you first need to adjust the height of the piercing head so that the bottom of the head comes close – but not necessarily touching – the top of the container. Then, simply lift the handle, put the container underneath, and press down to pierce the container.
As you do this, notice how the pressure increases, then take the dial thermometer and slide it down into the container. From there, lift the apparatus and shake it for 10 seconds. After doing so, note the pressure reading. Shake for another 10 seconds, then note the pressure reading again. Continue repeating these steps until the pressure no longer increases and you reach equilibrium.
Once you have reached equilibrium, take note of the temperature and pressure. From there, you can use the manual carbonation calculator (which utilizes the Heath formula) to determine the gas volume.
> WHAT IS THE MANUAL CARBONATION CALCULATOR?
The manual carbonation calculator is a handy little dial that can be adjusted according to the readings you get from the carbonation tester. From there, all the math is done for you. Read more about it here.
At the end of the test, open the snift valve with the hose leading into a sink or separate container to release the pressure and liquid. Then just lift the handle, remove the container, and you’re ready to test the next product.
10 Easy Steps
- Adjust the height of the piercing head so it comes close but doesn’t touch the top of the container
- Lift the handle
- Put the container underneath, then press the handle down to pierce the container
- Notice the pressure increase, then take the dial thermometer and slide it down into the container
- Pick up the apparatus and shake it for 10 seconds. Note the pressure reading. Repeat
- Shake until the pressure no longer increases – you’re at equilibrium
- Take note of the pressure and temperature at this point
- Use the manual Carbonation Calculator to determine the gas volume
- Once the test is done, open the sniff valve with the hose leading into a sink or different container to release the pressure and liquid
- Then lift the handle, remove the container, and you can move onto the next product
NEED MORE INFO?
If you want further information or just have any questions/inquiries about any of our products, feel free to browse our website or contact us directly!